Valorant can refuse to launch on a Windows 11 PC even when the computer feels perfectly healthy. The message usually points to Secure Boot, TPM 2.0, or Riot Vanguard. This is not simply a game setting: Vanguard checks security features that start before Windows, so reinstalling the game rarely fixes the underlying problem.
The safe approach is to check the current configuration first, protect your BitLocker recovery information, and only then change firmware settings. Motherboard menus differ, so use the names below as a map—not as an exact click-by-click script for every PC.
What Valorant is checking
On Windows 11, Riot Vanguard may require both TPM 2.0 and Secure Boot. TPM stores security measurements and keys, while Secure Boot allows the PC to start only with trusted boot software. Windows 11 also expects a UEFI-capable system. If Windows was installed in old Legacy/CSM mode, merely switching on a Secure Boot toggle may make the computer unbootable.
1. Check the current Windows status
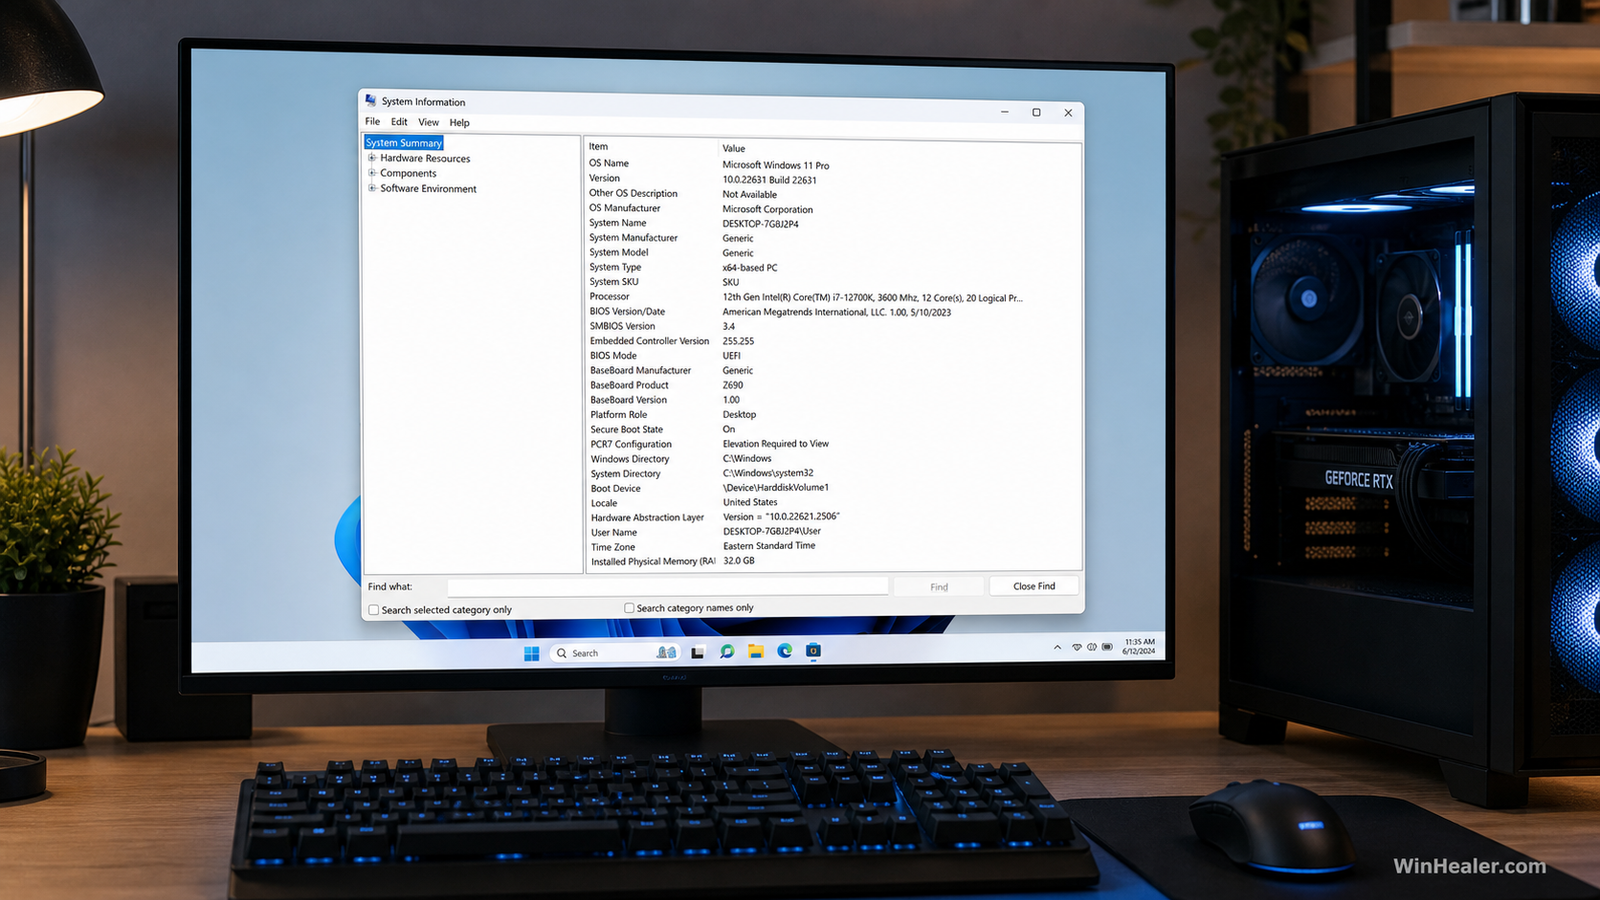
Press Windows + R, type msinfo32, and press Enter. In System Information, find these two lines:
- BIOS Mode: it should say UEFI.
- Secure Boot State: it should say On.
If Secure Boot State says Unsupported, check BIOS Mode first. A Legacy value normally means the Windows boot disk or firmware configuration must be addressed before Secure Boot can work.
Next, press Windows + R again, type tpm.msc, and press Enter. The TPM window should report that the TPM is ready for use, with Specification Version 2.0. If it does, do not clear or reset the TPM.
2. Save the BitLocker recovery key first
Firmware and boot-security changes can trigger a BitLocker recovery prompt. Before opening the BIOS, confirm that you can retrieve the recovery key for every encrypted drive. It may be stored in your Microsoft account, a work or school account, a printed copy, or a file saved when encryption was enabled.
Do not clear the TPM, update firmware, convert the boot disk, or change boot mode without a backup and a verified recovery key. On a managed PC, contact the administrator because company security policies may control these settings.
3. Enter the UEFI firmware safely
Open Settings > System > Recovery. Under Advanced startup, select Restart now. Then choose Troubleshoot > Advanced options > UEFI Firmware Settings. If this option is missing, consult the PC or motherboard manual for its startup key.
4. Enable UEFI and Secure Boot
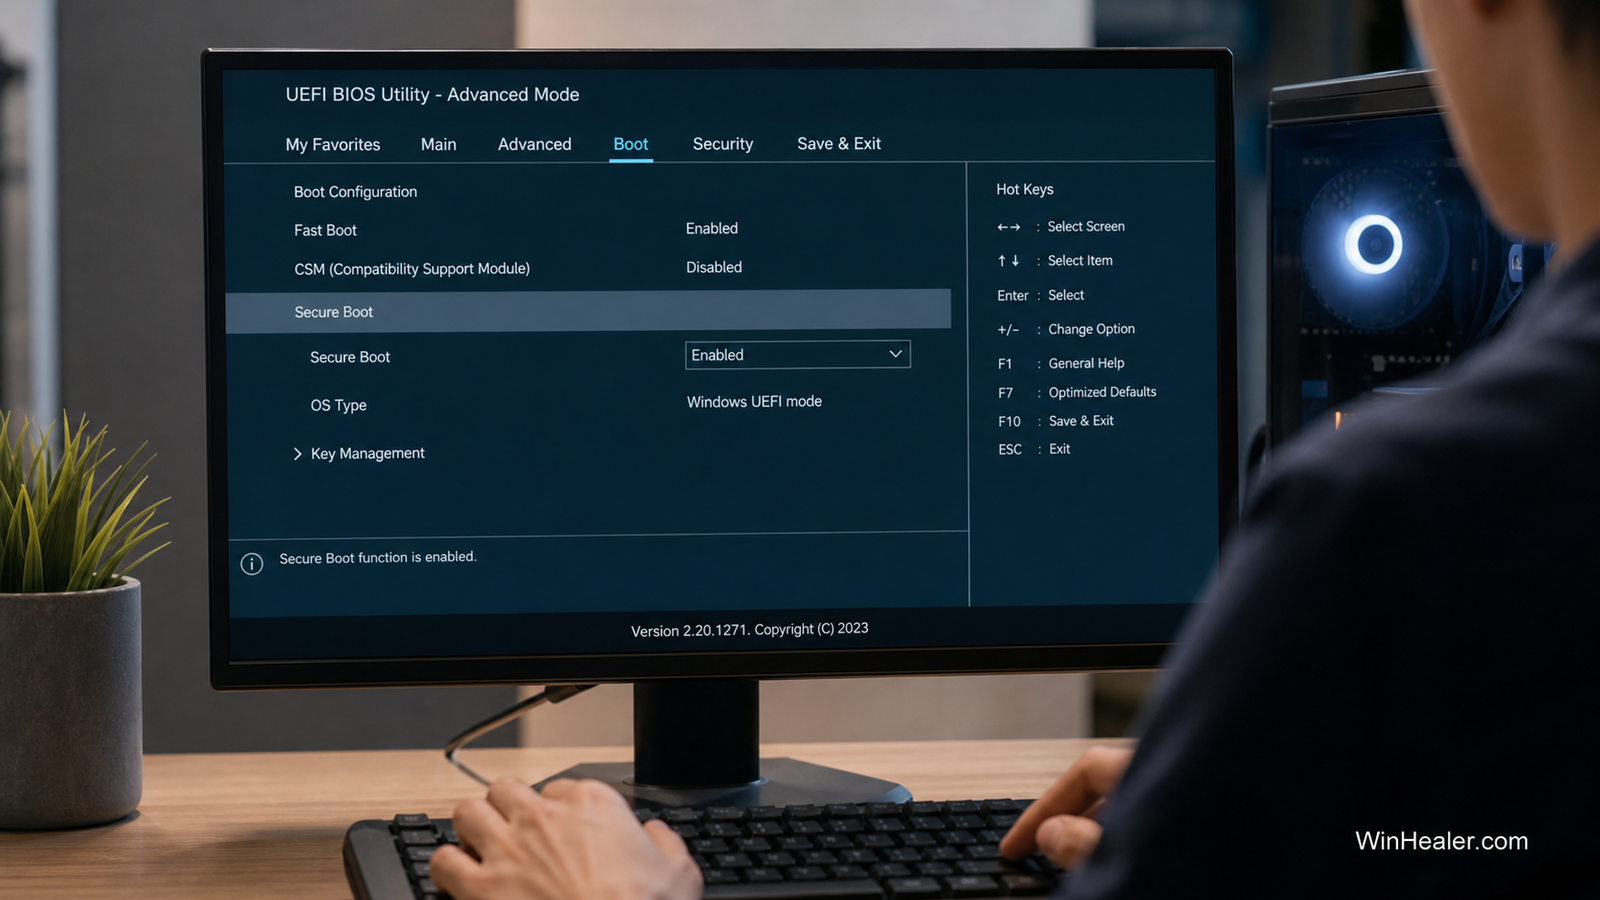
In the firmware menu, look under Boot, Security, Authentication, or Windows OS Configuration. Secure Boot may stay unavailable until Legacy Boot or CSM is disabled and UEFI mode is active. Some boards also offer an OS Type setting; the Windows UEFI option generally enables the correct policy.
If Secure Boot is enabled but Windows still reports Off, the firmware may be in Setup Mode without platform keys. Look for an option such as Install default Secure Boot keys, Restore factory keys, or Standard mode. Use only the motherboard maker’s documented option. Save changes and restart.
Important: if System Information currently says BIOS Mode: Legacy, stop here. Switching directly from Legacy/CSM to UEFI can prevent Windows from starting.
What to do when BIOS Mode says Legacy
A Legacy installation often uses an MBR-partitioned system disk, while a normal UEFI Windows installation uses GPT. Microsoft includes MBR2GPT for supported conversions, but this is a storage operation—not a harmless game tweak. Make a complete backup first and read Microsoft’s current MBR2GPT documentation.
An administrator can use mbr2gpt /validate /allowFullOS to check eligibility without converting. Validation success does not replace a backup. If the disk layout is unusual, dual-booted, encrypted in a nonstandard way, or contains irreplaceable data, get experienced help rather than forcing the conversion. After a successful supported conversion, firmware boot mode must be changed to UEFI.
5. Verify the result before launching Valorant
After Windows starts, open msinfo32 again. Confirm BIOS Mode: UEFI and Secure Boot State: On. Then open tpm.msc and confirm TPM 2.0 remains ready. Restart once more, open the Riot Client normally, and test Valorant.
If Vanguard still reports an error, install pending Windows updates, update the motherboard BIOS only from the PC or motherboard manufacturer’s official support page, and reinstall Riot Vanguard from Apps only after the firmware checks pass. Record the exact VAN error code because different codes can point to different checks.
Common situations and the right response
- Secure Boot shows Unsupported: check whether Windows is using Legacy BIOS mode.
- Secure Boot is enabled in BIOS but Off in Windows: default platform keys may be missing, or CSM may still be active.
- TPM is not found: look for Intel PTT or AMD fTPM in the official motherboard manual.
- BitLocker recovery appears: enter the saved recovery key; do not keep changing firmware settings blindly.
- PC no longer boots: return the firmware boot-mode setting to its previous value, then seek model-specific guidance.
What not to do
Do not download modified BIOS files, use registry bypasses, clear the TPM without a recovery plan, or disable Windows security features to satisfy an unofficial tutorial. Also avoid copying exact BIOS settings from a different motherboard. Similar-looking options can behave differently across vendors and firmware versions.
Final checklist
- BitLocker recovery key verified and important files backed up
- BIOS Mode reports UEFI
- Secure Boot State reports On
- TPM reports ready with Specification Version 2.0
- Valorant and Riot Vanguard are current
When those checks pass, Secure Boot-related Valorant errors should be resolved without weakening the PC’s security. If the values do not match, use the motherboard’s exact manual and change one setting at a time.